 CuraCourse
What a Cloud-based Lab is
A Cloud-based Lab puts a code editor next to your instructions. Each student gets their own copy of the files you provide and can run their code without installing anything.
Create a lab
-
In the course outline, add an item and choose Cloud-based Lab.
-
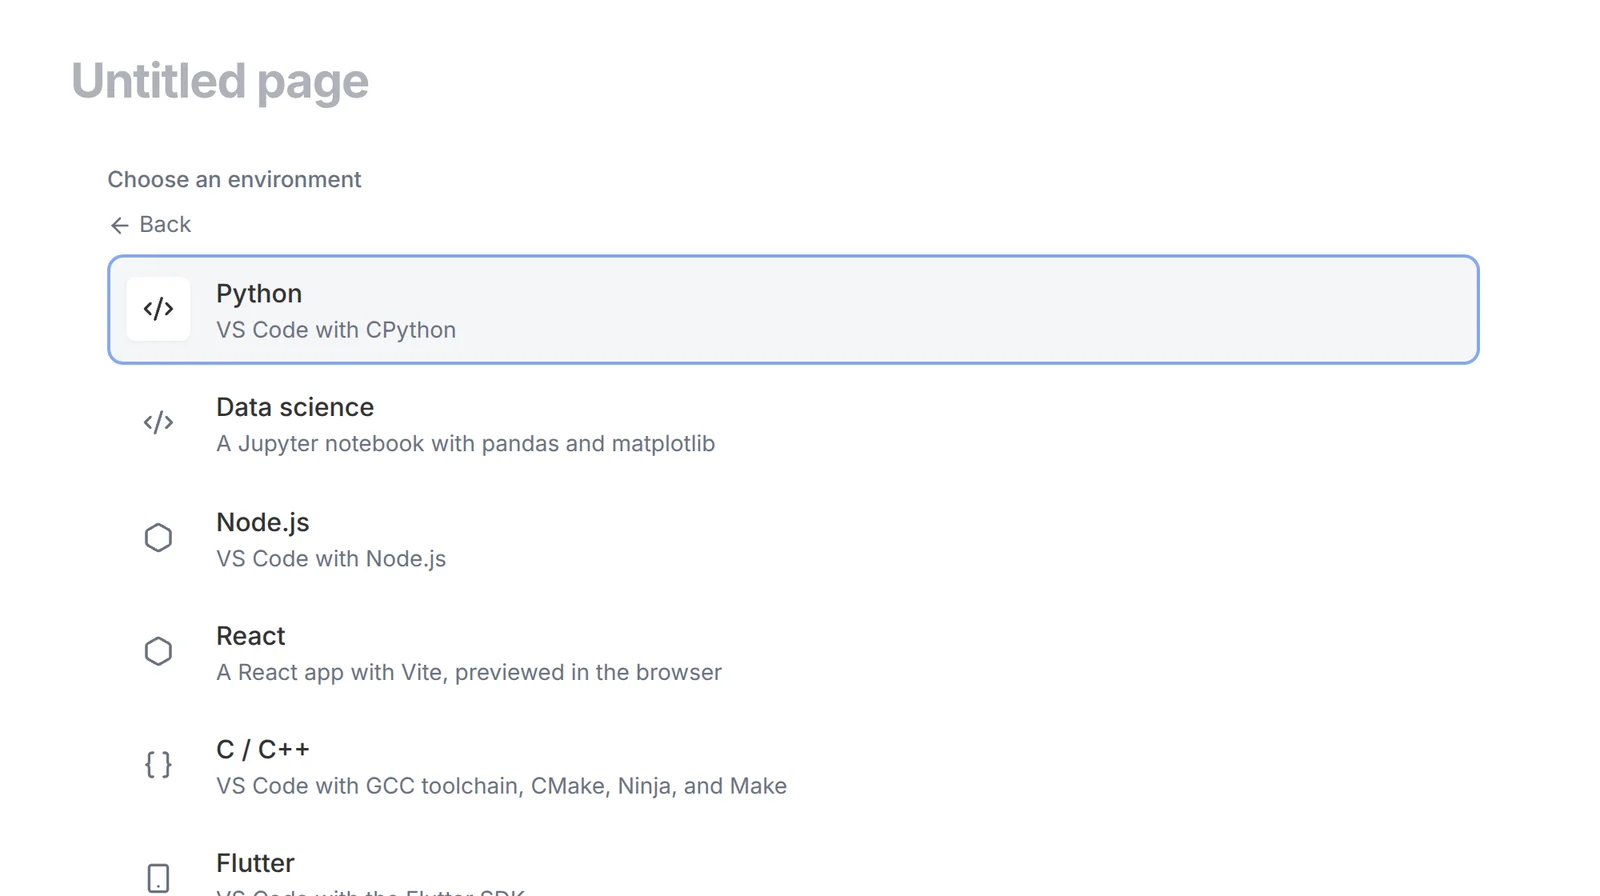
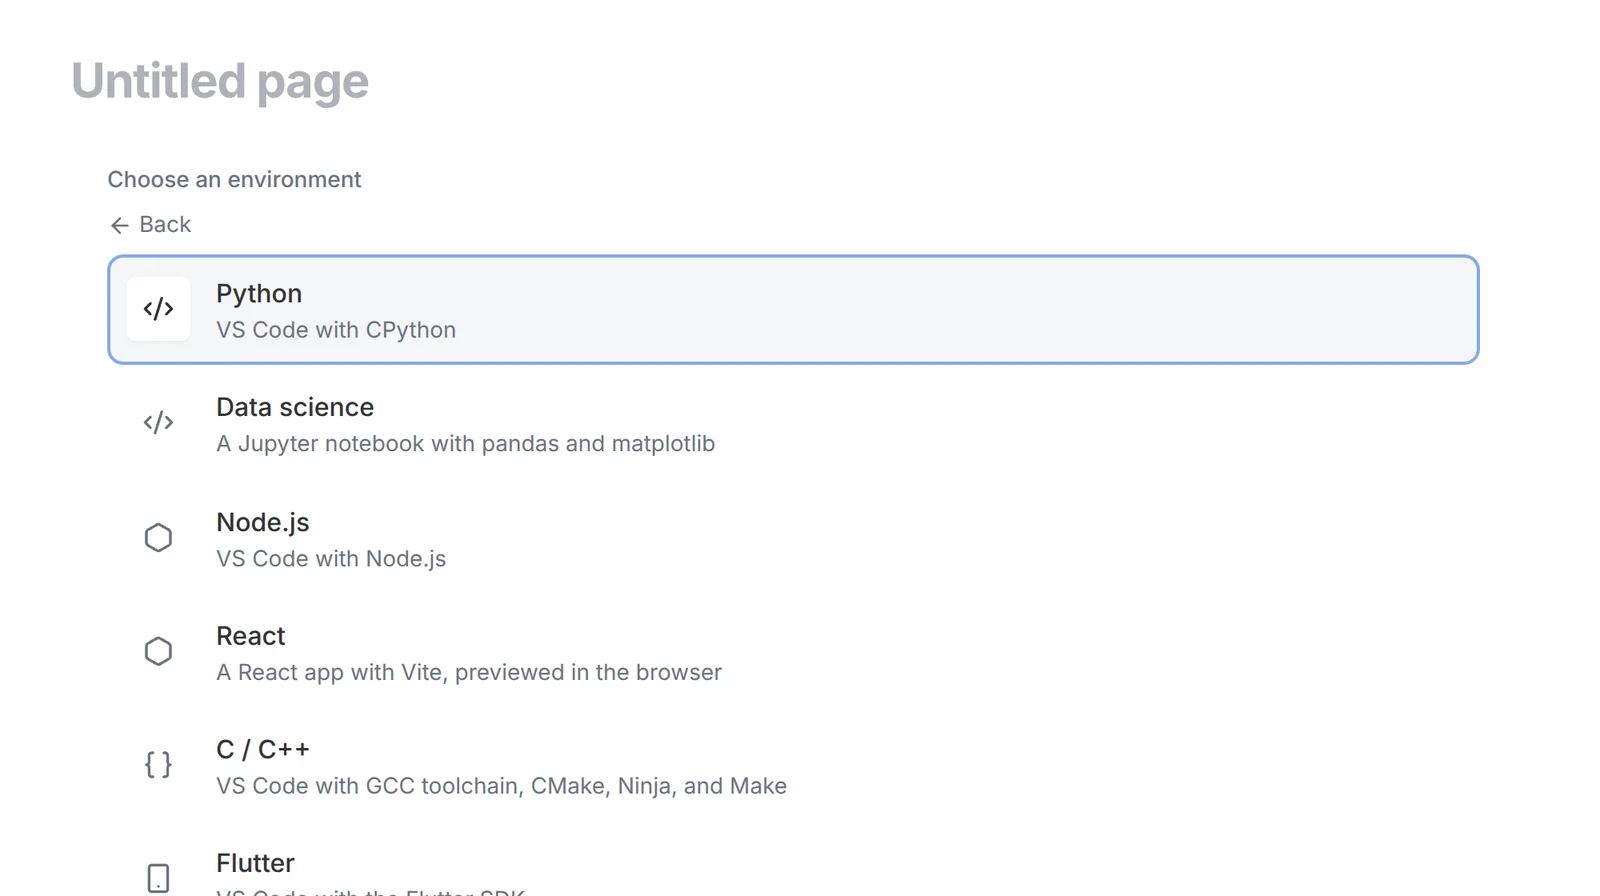
Pick a starter: Python, Data science, Node.js, React, C / C++, or Flutter.
-
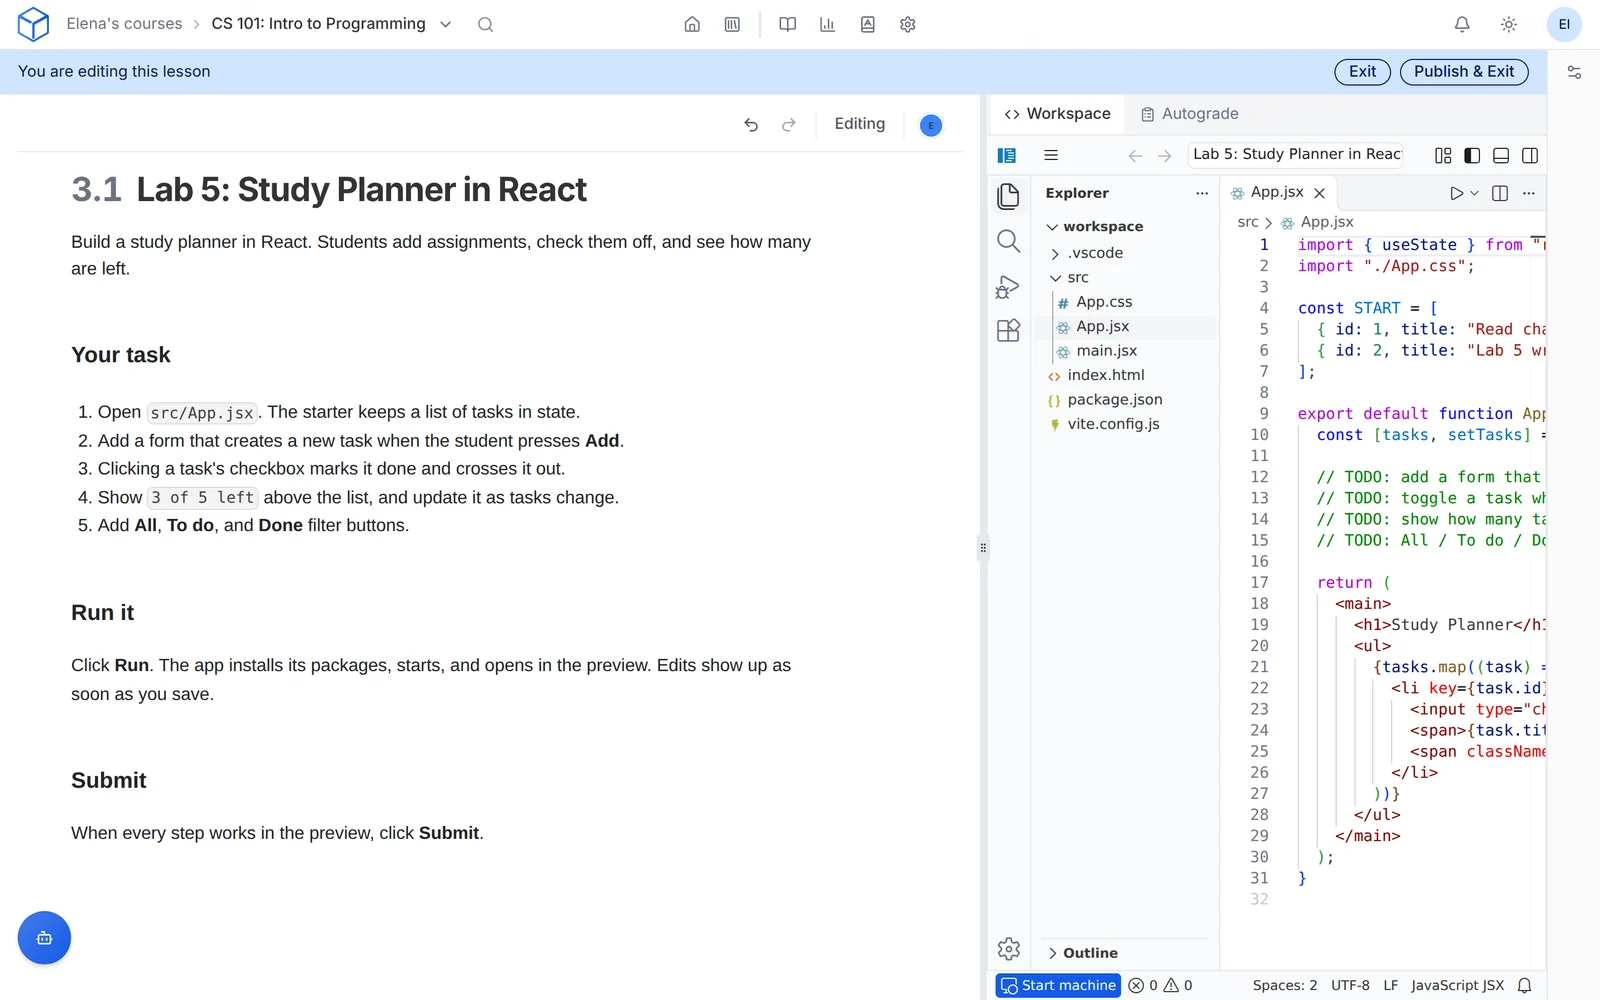
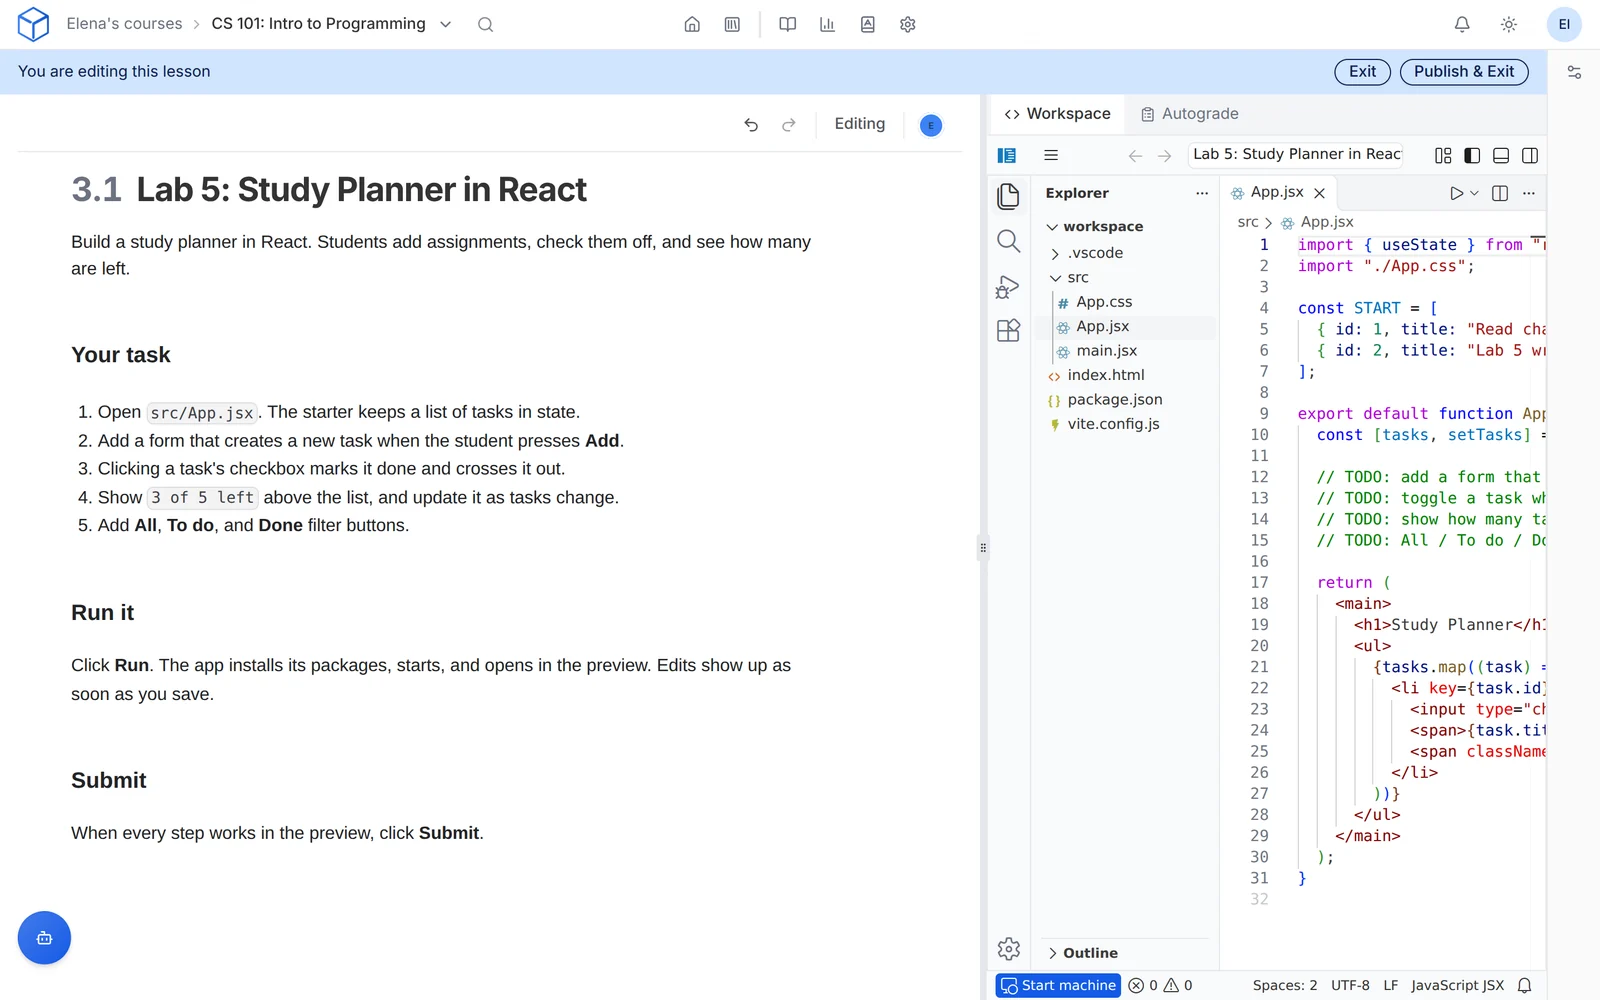
Write your instructions on the left. The code editor is on the right.
Add starter files
Add the files students should start with, using the file list in the editor. To try your code or install something, choose Start machine in the bottom-left corner. This gives you a computer in the cloud with a terminal.
For terminal settings or extra Python packages, see customize the code environment.
Python packages
Python labs come with numpy, pandas, matplotlib, seaborn, SymPy, requests, Flask, Beautiful Soup, and pytest. To add another package, such as scipy, start the machine and run pip install scipy in the terminal. Students get it when you publish.
Command-line tools
In a Node lab, install a command-line tool with npm install -g, for example npm install -g firebase-tools. Students get it when you publish.
Share it with students
Students get your starter files the first time they open the lab. If you change the files later, publish the page again. Students who already opened the lab keep their own copy. They can choose Start over to get your latest files, but that replaces their work.
Choose what Run does
The Run button runs whichever file is open. That suits most labs.
If your lab should always run the same thing, such as a main file, select the arrow next to Run and choose Configure Run…. Choose Run a command… and type the command, for example python3 main.py. Students get the same setting when you publish. To switch back, choose Run the open file.
Set up the editor for students
New labs open their main file for students. To show them something else, arrange the editor the way students should see it: open the files, drag the tabs into order, split the editor if you like, and open the terminal if they'll need it. Then select … at the top right of the editor and choose Save Layout for Students. Students get the same layout the first time they open the lab, with the tab you had selected in front. To start them with nothing open again, choose Clear Layout for Students.
Add extensions
Extensions add features to the editor, such as support for another language. When you install one, CuraCourse asks whether students should have it too. Choose Add to assignment. You can also find Add to assignment in the extension's gear menu.
Websites students build
If a program starts a website, the editor offers Open in Browser. Only the student and course staff can see it. To let anyone see it, open the Ports tab at the bottom of the editor and change its visibility to Public.
Review student work
Open a student's lab from the learner list. When a student submits, you see their files exactly as they were at that moment.
If something goes wrong
- A message says the files can't be found: choose Contact support in the message.
- A student broke a starter file: they can choose Start over. It replaces all of their files, so they should copy anything they want to keep first.
- Run doesn't work for a file: set a command with Configure Run….